Wednesday, 28 March 2012

Jelly Playdough

This week Master E and I decided to try out a new recipe for Playdough. He loves cooking and this one was so simple. Here is the link http://www.playdoughrecipe.org


We followed these instructions

Ingredients 

  • white flour – 1 cup
  • salt – 2 tbsp
  • cream of tartar – 2 tbsp
  • cooking oil – 2 tbsp
  • warm water – 1 cup
  • Jelly – 1 pack ( We used aeroplane blue lemonade jelly)

Method

    • Add all the ingredients together in a big mixing bowl
    • Mix all the ingredients together until consistent
    • Pour into a pan and stir continuously over medium heat
    • Wait for it to thicken into a big ball and then place it on a piece of wax paper to cool
    • Kneed it for a few minutes once cooled


Master E loves cooking, here he is with the ingredients ready to get started.

Lots of fun was had tipping the ingredients in. 
There was plenty of oppotunity to touch after putting in each new ingredient and talking about what things felt like.

Some stirring.

Adding the jelly crystals.

Loving pouring in the water!

Lots more stirring and talk of lumpy and wet.

What our playdough looked like before being cooked.

Starting to come together.

Hot, fresh from the saucepan.

All kneaded and ready for play. It smells great as it has taken on the scent and colour from the jelly.

This made a small amount of playdough, but it looks and smells fabulous. Looking forward to having a play with it!

Wednesday, 21 March 2012

Easy Peasy Threading Fun

It was a revolting wet day here so we needed something quick and easy to entertain us. Threading was just the thing. I had a quick look through the pantry to see what I could find. I had two different types of pasta which were different sizes. I had been keeping the milk bottle tops for awhile with no purpose so quickly put some holes in them with a pair of scissors and found some threading laces that I had brought previously. But any kind of string, wool, ribbon would of done.

What we started with: two different sizes of pasta, some bottle tops and threading laces.

Before we started I tied a knot in the end of the threading laces and put on a bottle cap to act as a stopper.

Master E concentrating very hard at pulling the lace through the lid.

Miss M was keen to have a go but needed lots of help.

We also decided to add some straw for a bit more colour, however, they were too thin for the laces to slide through easily and soon got discarded. 
 Miss M soon got frustrated and enjoyed just playing with the pasta.

Master E with his growing masterpiece.

The bottle tops were a hit!

Lots of concentration while working on his fine motor skills.

This activity went on for much longer than I expected. Master E was very interested and kept at it for quiet some time. It was fabulous for developing his fine motor skills and I loved it as it was so quick and easy to prepare. When we were finished we popped all the pasta and lids into a bag ready to be used again another day.

Enjoy!


Monday, 19 March 2012

Treasure Hunting (for pegs)!!!

My Cheeky Monkey's absolutely love clothes pegs and since we are in the lead up to Easter I thought we might need a bit of hunting practice. This was a really quick and easy activity to set up ( I quickly hid approx 30 clothes pegs around our undercover area of the backyard for Master E and Miss M to collect all while they watched an episode of Peppa Pig!)


So here is what we had 2 buckets (1 for each monkey) and lots of clothes pegs.

Since Miss M is only 18 months and Master E is 2.5years I made sure not to make the hiding too difficult.

Some more of our hidden pegs!

As soon as Master E walked out the back door he commented  "ohhhh Mummy Pegs." So I gave him and Miss M a bucket and set them off.

There was lots of talking about on and off when they moved the pegs. Lots of under and on top of. Some sharing also occurred when Master E realised Miss M didn't have many pegs he helped her find some and then gave her some of his own!


Pegs were in the most unusual places!

Of course the pegs had to go for a ride in the back of the bike.


Found some more on the gate.

And in the garden!


Once we had collected all the pegs it led to a discussion about who had more and we had to do a quick count, followed by some colour sorting.


Our simple Treasure Hunt ended up being a bit of a Maths Lesson with lots of directional words used, some counting and sorting. Not bad for having fun!!!

Sunday, 18 March 2012

Easy Outdoor Fun


It's a glorious day here so why not head outside for some fun in the sun. Here are a couple of easy things to do to entertain your toddler outside.


A watering can and a bucket of water keeps Master E busy!

A bucket of chalk is always a winner. Let them draw, write and scribble until their heart is content and the next time it rains it will be easily washed away!

Bubbles!! Even Miss M loves trying to blow bubbles.
Enjoy! We will be adding lots more simple outside activities in the weeks to come!

Thursday, 15 March 2012

Rainbow Butterflies ~ Inspired by The Very Hungry Caterpillar

We are The Very Hungry Caterpillar by Eric Carle mad at our house. So have been very busy thinking of new crafts to do that revolve around either caterpillars or butterflies.

Master E and I had great fun making lots of mess and creating the most beautiful coffee filter butterflies.

This can be rather messy and you may wish to do this one outside!!

You will need:
Coffee Filters
Food Colouring
Spray Bottles
Water


The Coffee Filter

Trim off edge of coffee filter so it can be opened out.

Fold the coffee filter back in half and trace on a butterfly shape.

Open up ready for spraying! Be sure to lay the coffee filters on top of either some paper towel or newspaper to absorb the liquid that runs through the filters.

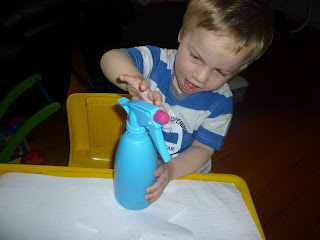
I added a small amount of water and some food colouring to some squirty bottles and let Master E go crazy spraying to his heart was content. I had two different bottles one with blue food colouring and one with red.

A rather wet butterfly laying on some paper towel to absorb some of the liquid that flows through the filter.

Another of Master E's butterflies. We did quiet a few as it doesn't take very long.

For the last butterfly Master E decided that he would just press the filter onto the damp paper towel which absorbed the colour just as well as spraying it on.

Some of the beautiful butterflies drying. Love the way the colours bleed together and we get some lovely purple. A great activity for colour blending and mixing.


Some of the finished butterflies hanging up in Master E's bedroom!

Wednesday, 14 March 2012

Simple Fine Motor Fun

Looking for something simple to keep the kids amused for awhile. This is so easy and a great fine motor activity. I filled a couple of old egg cartons with various sized and textured pompoms. Left some small ice tongs with them and let the kids explore.

Wow, look what's in here! 
Master E working out how to use the tongs and getting a cup to put his pompoms into.

Good squeezing. Lots of chat about in and out.

Miss M was keen to have a go but got frustrated when she couldn't manipulate the tongs and used her fingers instead.

Practising some more in and out.

Tuesday, 13 March 2012

Beautiful Butterflies ~ Inspired by The Very Hungry Caterpillar


 The Very Hungry Caterpillar by Eric Carle is the current favourite book in our house so we have been trying to think of as many butterfly and caterpillar related crafts as we can.


You will need some thin coloured card, clear contact and we used pre cut paper mosaic squares.

I had already pre cut the shapes of the butterflies and and stuck the contact to the back so there was a  sticky side for the children to stick there squares straight onto, no need for glue.

Miss L very carefully sticking her squares onto the contact.


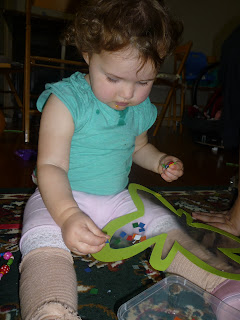
Miss M was having lots of fun once she got the idea.
Miss G, took the most care and was very carefully putitng her squares on. She was very carefully selecting the colours and seeking out the pink!

Master E had a different approach. Just tip as many of the squares as you can and then shake off the rest. A very efficient way of getting you butterfly decorated.


Testing one of the butterflies on our window to see how it looked. 
Busy creating, and having fun spreading the mosaic squares across the lounge room.


Miss G very proudly showing off her finished butterfly.


The finished masterpieces. Looking fabulous!!!