Showing posts with label Toddler. Show all posts

Wednesday, 22 January 2014

More Easy Toddler Cooking ~ Apricot Balls ~ No Bake

These school holidays the kids have been nagging me about cooking with them. I am always so reluctant, no idea why. Just the thought of cooking with a 3 and 4 year old makes me shudder. I finally gave in after watching an episode of Playschool where they made Apricot Balls. So here is our version. 
Very messy but so Toddler friendly and a little bit YUMMY too!

Ingredients

500g Dried Apricots Roughly Chopped
2 1/2 Cups of Dessicated Coconut
395g Can Condensed Milk
Extra Coconut for Rolling


Combine all ingredients in a large mixing bowl.

Then stir, (poking your tongue out helps mix!)

And stir some more

Until well combined 
Roll into balls and roll in extra coconut. (Wet hands helps). Refrigerate until firm and eat!!!
Yum!


These tasted great and were super easy. Will surely be making them again soo
n. 

Wednesday, 13 March 2013

Super Cute Easter Bunny Masks

Easter is fast approaching and the Toddler Timers and their friends are super excited, so there are lots of Easter Crafts happening. Today we made some very cute Easter Bunny Masks.

We started with:

Cardstock
Coloured Paper ~ Cut into shapes to place inside the ears and strips for whiskers.
Thin Elastic
Cotton Balls
Pom Poms
Glue Sticks


I did a fair bit of preparation for this craft. I started by creating a rabbit mask template. I cheated a little bit and found a mask the Toddler Timers had in their dress ups and used this to get the face and eye shapes, then I just added the long ears to make rabbits!

I precut the masks all out as this would take too long and be too difficult for most of the kids. I find using a scalpel much easier than scissors when cutting out inset shapes, like the eyes

I also had hole punched and threaded elastic into the masks. 

The Toddler Timers then choose a colour to paste into the ears and covered their masks with cotton balls.

Miss M carefully adding the colour to her bunny's ears.

Miss A working hard.

Miss A using her fine motor skills to separate the cotton balls ready to paste on to her mask.

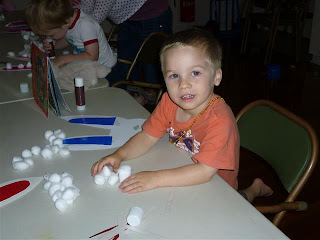
Master E stockpiling the cotton balls.

Little Miss S keen to have a go like the big kids.


Miss A deep in thought.

Master S trying his mask on for size.

Miss L hard at work.


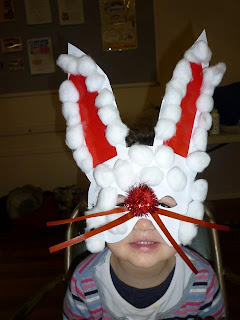
The gorgeous Bunny Miss L. Once we had finished adding the cotton balls we added some strips of paper for whiskers and  a Pom Pom for a little Bunny nose.


Master J making a super cute Easter Bunny.

The lovely Bunny Miss O.

The cheeky Bunny Master E.

The gorgeous Bunny Miss G.

Little Miss M having a turn of her big Sister Miss A's mask.

Miss A making a lovely Easter Bunny.

Miss M very proud of her mask.
The children really enjoyed making these and when we were finished there were some very cute little Easter Bunnies hopping around.

Tuesday, 12 March 2013

Easy Easter Egg Craft!

Looking for a simple messy free Easter Craft? This is by far one of the easiest I have done.

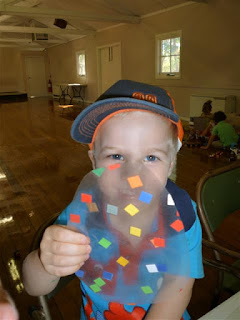
We started with some clear contact, I cut it into large rectangles and then folded it firmly to make a crease in the middle. Open half of the contact up to the creased point and then added pre-cut mosaic squares (tissue paper would also work well). Once the children had enough decorating we shook off any loose squares and covered them over with the remaining contact. An adult then cut them into Egg Shapes and there it is Ta Da! Easy peasy Easter Eggs!


Miss L very carefully choosing where to place her squares and working on some great Fine Motor Skills!

Miss A adding lots of colour.


Folding the contact over and pressing it down firmly. 

So easy even Miss S was keen to give this one a go!

Miss A very proud of her finished Easter Egg.

Master E showing off his handy work.
 
A very proud Miss G!

Tuesday, 18 December 2012

Easy Toddler Cooking ~ Truffles

I'm usually not keen to cook with the kids, to be truthful, I'm usually not all that keen to cook at all!  The Toddler Timers however are. So here is my compromise, no bake cooking to make truffles. We made kid friendly ones and covered them with hundreds and thousands rather than the usual coconut. 


Ingredients:

1 Packet of Marie Biscuits
1 Can of Condensed Milk
1 Cup of Desiccated Coconut
2 Tablespoons of Cocoa
100's and 1000's to cover truffles

Before we were ready to start I pulsed the Marie Biscuits in the food processor until they were fairly fine.  We then added the coconut.

Next went in the Cocoa and finally the Condensed Milk.

Then it was time to stir, stir.

Stir!

And of course have a taste test.

We then rolled the chocolate mixture into small balls and then rolled them in Hundreds and Thousands.

This bit was a little bit messy and a tiny bit sticky! (Warning, we had Hundreds and Thousands EVERYWHERE!!! Nothing a vacuum couldn't fix though!)

The best bit about cooking is helping to 'Clean Up!'

Our finished Christmas Fairy Truffles all ready to share at Mother's Group tomorrow!

Wednesday, 8 August 2012

Bugs, Bugs, Bugs!

I would love to claim credit for this craft as it is fabulous, unfortunately I cannot. We picked up this great little idea from Playgroup.

To make these cute little bugs you will need a few bits and pieces and depending on the age of the children, adult help will be required.

What you need:
Strawberry Punnets (or something similar)
Felt
Googley Eyes
Pipecleaners (we had two different sorts, one for legs and one for inners!)
Stickers for decorating
Hole Punch
Sticky Tape
Double Sided Tape (or Glue Gun)

There was a little bit of preparation needed for this activity.
The felt needed to be precut and stuck onto the lids of the punnets (we were working with 3 year olds, older children could do this themselves!) and the eyes were also already added. (I secured these with hot glue, you could use double sided tape).
An additional hole was also punched into the top of the strawberry punnet to allow for extra legs as they already had four holes in the lid.


All ready for the kids to get started. 

One of the punnets with its felt and eyes already attached. The holes to thread the pipecleaner legs through are on the lid next to the felt. 

We started by threading three pipecleaners through the holes in the top of the punnet and securing in place with a piece of sticky tape. Some of the children could do this by themselves and others needed some assistance. Was great for hand eye coordination and fine motor skills.

We then wound pipecleaners around our fingers, enough to fill the punnet and create inner of our bugs. 
Snap the lid closed, secure with tape and decorate!
We used sticker dots to decorate our bugs. Master E concentrating very hard!

Miss A busy decorating her bug.

Master T very proud of his finished Bug!

Miss A hard at work.

Miss O working hard!

Love the concentration on Miss L's face as she decorates her bug.
These bugs were a huge hit and I will be thinking carefully how to modify this idea and make some other creatures. We have an abundance of strawberry punnets in our house with Miss M being a strawberry addict!
Enjoy x