Showing posts with label Craft. Show all posts

Friday, 11 April 2014

Easter Threading ~ Straw and Pipe-cleaner Rabbit Ears

The Toddler Timers are Easter obsessed and the weather here is atrocious at the moment so we have been up to heaps of Easter Crafts.
This one is super easy and cheap.

What you will need:

Straws (Cut into short lengths ours were approx 2cm)
Pipe-cleaners
Scissors


We started by twisting two pipe-cleaners together to form a long length. You will need to do this with 6 pipe-cleaners forming 3 double length pieces.

Thread away until your heart is content, leaving about 1cm at each end.

Twist the two ends together to form a ring. This will be the headband part used to attach the ears.

Thread the other two lengths of pipe-cleaner again leaving roughly 1cm at each end. This time bend to form more of a tear drop shape. Use the exposed ends to twist and fix on to the headband. Repeat to create the other ear and then you are done.

Master E being a very cute bunny!

Miss M, she was more of a floppy eared bunny, but loved it all the same!


These were quick and easy and required hardly any preparation and clean up. Love a mess free craft for a change! Was great for fine motor too!

Hope you enjoy and Happy Easter!

Sunday, 24 February 2013

Threading with things from around the house


Craft doesn't always have to be complicated or messy. Sometimes it's nice just to make something really simple and with things you have lying around. It is still really hot here so today we were trying to have a fairly quiet afternoon in. Miss M and Master E are always keen to craft so this afternoon we got busy threading and creating some hanging decorations. 


We started with things I had lying around, coloured pasta left over from previous crafts, bottle tops, short lengths of straws, honeycomb mesh and some small patty pans.


I tied off a piece of coloured pasta to the end of some curling ribbon to form a stopper, we also used some child friendly plastic needles for the first time and these were a real hit.

It took awhile for Miss M to master pushing the needle through the patty pans, but  once she got the hang of it I couldn't stop her. This is great for building fine motor and hand eye coordination. 


Once our ribbon was full I tied it off around another piece of pasta to form another stopper.

Master E's finished masterpiece. 

Miss M's glorious creation.

Simple crafting at it's best. What simple crafts do you like to do? We would love to hear your ideas!

Tuesday, 5 February 2013

Tape Resist Initial Canvases

I brought some dot painters awhile ago and have been looking for a good way to try them out when I came across a gorgeous post on Resist Painting on Happy Whimsical Hearts which had me thinking. I loved the idea of creating canvases for the Toddler Timers to put up in their rooms and using the Tape Resist Technique.
So here is our attempt at something very similar.

We used canvases that I grabbed from The Reject Shop, they had a four pack for $5 which I thought was a bargain.

I used some low tack masking tape to tape off a M for Miss M and an E for Master E.


Then I let them loose with the dot painters. These were fabulous as there was a controlled amount of paint coming out and no spills or real mess of any kind.


We quickly covered the canvases with dots and were keen to do some more painting so I left Master E and Miss M to freely cover the 2 spare canvases in any way they wished.


Once the canvases had dried I carefully removed the tape to reveal their initials. The results look amazing and Master E and Miss M are keen to have them up in their rooms.

Wednesday, 8 August 2012

Bugs, Bugs, Bugs!

I would love to claim credit for this craft as it is fabulous, unfortunately I cannot. We picked up this great little idea from Playgroup.

To make these cute little bugs you will need a few bits and pieces and depending on the age of the children, adult help will be required.

What you need:
Strawberry Punnets (or something similar)
Felt
Googley Eyes
Pipecleaners (we had two different sorts, one for legs and one for inners!)
Stickers for decorating
Hole Punch
Sticky Tape
Double Sided Tape (or Glue Gun)

There was a little bit of preparation needed for this activity.
The felt needed to be precut and stuck onto the lids of the punnets (we were working with 3 year olds, older children could do this themselves!) and the eyes were also already added. (I secured these with hot glue, you could use double sided tape).
An additional hole was also punched into the top of the strawberry punnet to allow for extra legs as they already had four holes in the lid.


All ready for the kids to get started. 

One of the punnets with its felt and eyes already attached. The holes to thread the pipecleaner legs through are on the lid next to the felt. 

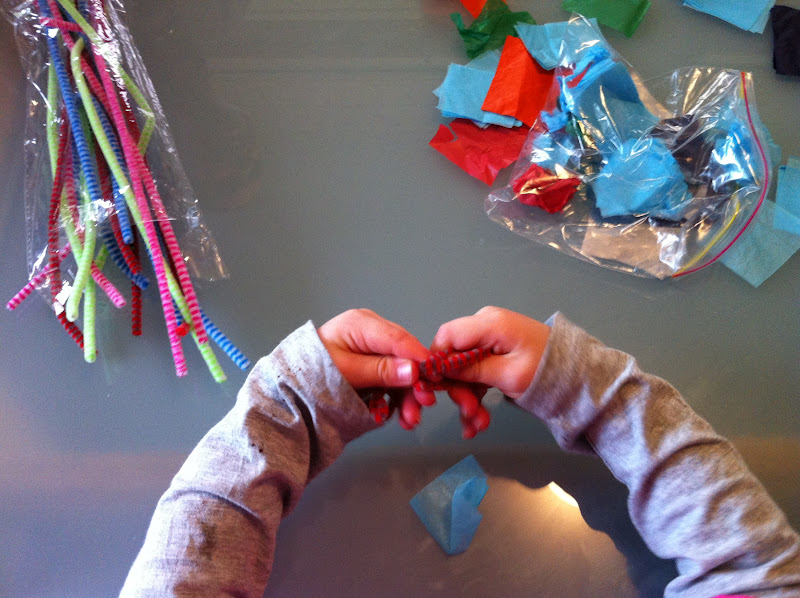
We started by threading three pipecleaners through the holes in the top of the punnet and securing in place with a piece of sticky tape. Some of the children could do this by themselves and others needed some assistance. Was great for hand eye coordination and fine motor skills.

We then wound pipecleaners around our fingers, enough to fill the punnet and create inner of our bugs. 
Snap the lid closed, secure with tape and decorate!
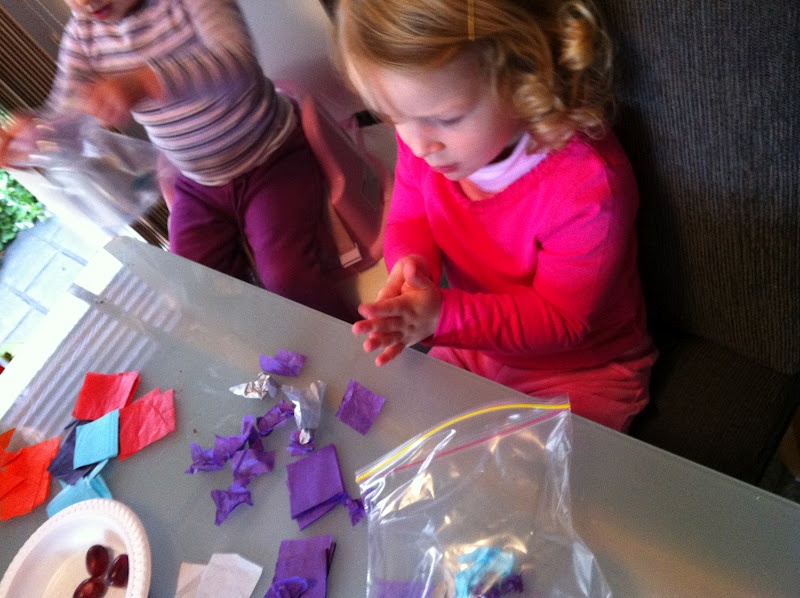
We used sticker dots to decorate our bugs. Master E concentrating very hard!

Miss A busy decorating her bug.

Master T very proud of his finished Bug!

Miss A hard at work.

Miss O working hard!

Love the concentration on Miss L's face as she decorates her bug.
These bugs were a huge hit and I will be thinking carefully how to modify this idea and make some other creatures. We have an abundance of strawberry punnets in our house with Miss M being a strawberry addict!
Enjoy x

Monday, 16 July 2012

Paper Plate Tambourines

Looking for an easy craft to fill in a Winter afternoon. These Paper Plate Tambourines are super easy and made with items you can find in your pantry!


Here is what we started with, some paper plates, macaroni (any pasta will do, this is just what I had in the cupboard!) and some cellophane cut into strips.

Before we started, I turned two plates over so as to create a pocket in the centre and then stapled around the outside, making sure to leave an opening at the top so the children could add their pasta. We decorated our tambourines, added the pasta and stapled to close off the gap, adding some stripes of cellophane for tails.

Miss M busy decorating her tambourine with textas.

Master S with his finished tambourine, all ready to make some music!

Master E using his Tambourine as a steerling wheel!

Miss A and Miss O looking very proud of their efforts!
The gorgeous Miss L with her tambourine.


Wednesday, 4 July 2012

Zip Lock Bag Butterflies

I love searching the internet for wonderful crafts clever people have already thought of. Here is a super simple craft you can do with things you have at home! Easy butterflies, made using zip lock bags, tissue paper and pipecleaners. Thanks to Busy Bee Kids Crafts for this one!!!


Here is what we did.

1. Before we started I cut the tops off the zip lock bags just above the zip so that they still closed but didn't have any over hang.

2. Scrunched up little squares of tissue paper to fill the bags (about half way, fabulous for fine motor)

3. Closed the bags carefully squeezing out as much of the air as we could.

4. Gather the bag in the middle and wrap a pipecleaner around a couple of times leaving two ends to be bent into antennae.

5. Voila Zip lock bag butterflies!

Miss A very busy scrunching her tissue paper into balls to put into her bag.

Miss L, Miss G and Miss A all busy scrunching!

Master J filling up his bag.
Miss M and the lovely birthday girl Miss O filling their bags.
Testing out the pipecleaners.


Carefully squeezing the air out of the bag.

Master E flying his butterfly!


Wednesday, 23 May 2012

Do it yourself Coloured Pasta

Making coloured pasta is simple. Here is how Master E and I made up ours.


You will need
Pasta ~ We used Rigatoni as we are planning on using it for threading and it's nice and chunky
White Vinegar
Assorted Food Colouring
Zip Lock Bags
Paper Towel or Baking Paper

All our bits and pieces ready to go!

Pop the pasta (I used about a cup) into the zip lock bag with 2 tablespoons of vinegar and as much food colouring as you like.

Zip up the bag and shake, shake, shake! Leave in the bag for about half an hour.


Pop onto some paper towel to dry and absorb and extra liquid.  
And there you have it, coloured pasta ready for threading, crafting or whatever you like!!!!