Showing posts with label threading. Show all posts

Friday, 11 April 2014

Easter Threading ~ Straw and Pipe-cleaner Rabbit Ears

The Toddler Timers are Easter obsessed and the weather here is atrocious at the moment so we have been up to heaps of Easter Crafts.
This one is super easy and cheap.

What you will need:

Straws (Cut into short lengths ours were approx 2cm)
Pipe-cleaners
Scissors


We started by twisting two pipe-cleaners together to form a long length. You will need to do this with 6 pipe-cleaners forming 3 double length pieces.

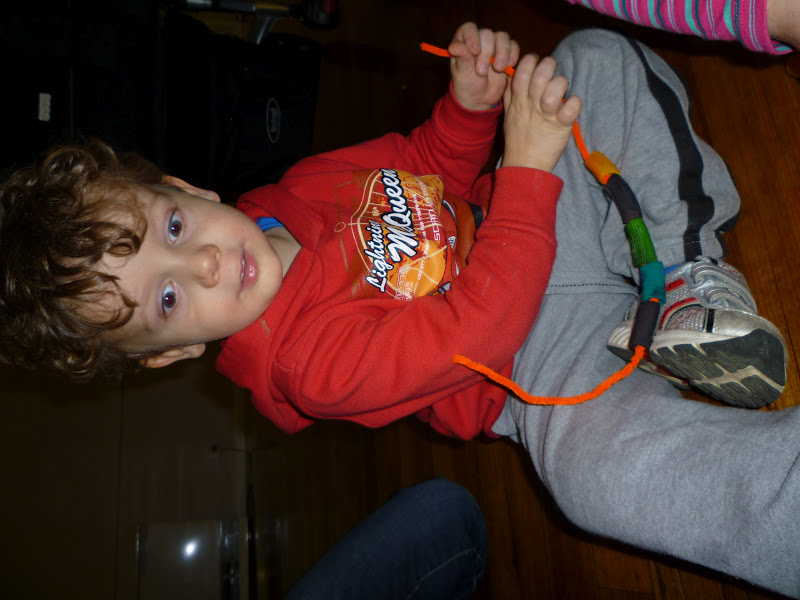
Thread away until your heart is content, leaving about 1cm at each end.

Twist the two ends together to form a ring. This will be the headband part used to attach the ears.

Thread the other two lengths of pipe-cleaner again leaving roughly 1cm at each end. This time bend to form more of a tear drop shape. Use the exposed ends to twist and fix on to the headband. Repeat to create the other ear and then you are done.

Master E being a very cute bunny!

Miss M, she was more of a floppy eared bunny, but loved it all the same!


These were quick and easy and required hardly any preparation and clean up. Love a mess free craft for a change! Was great for fine motor too!

Hope you enjoy and Happy Easter!

Saturday, 13 April 2013

Threading with Leaves ~ Simple Cost Effective Crafting!

We had a visit to a lovely park this week and managed to come home with a great collection of leaves. I had previously seen a wonderful post on threading with leaves from A Little Learning for Two and decided we would have a go too!

We used:
Leaves
Curling Ribbon (I seem to have an abundance of this!)
Child friendly Needles 
Scissors


We started by removing all the leaves from the twigs we had collected. 

I cut off lengths of curling ribbon and tied a knot at the end to prevent the leaves from all slipping off and attached the child friendly needle at the other.

We then got busy threading, the needles pushed through the leaves quiet easily and is great for fine motor development and hand eye coordination. We used eucalyptus leaves so there was also a lovely scent when the leaves were pierced.


Once we had enough threading I tied the ribbons off to make a necklace. This is Master E with his beautiful necklace.

A very proud Miss M showing off her necklace.


We had lots of fun with this one and it was soooo easy and very cost effective too. Next time we might add some flowers into the mix!

Sunday, 24 February 2013

Threading with things from around the house


Craft doesn't always have to be complicated or messy. Sometimes it's nice just to make something really simple and with things you have lying around. It is still really hot here so today we were trying to have a fairly quiet afternoon in. Miss M and Master E are always keen to craft so this afternoon we got busy threading and creating some hanging decorations. 


We started with things I had lying around, coloured pasta left over from previous crafts, bottle tops, short lengths of straws, honeycomb mesh and some small patty pans.


I tied off a piece of coloured pasta to the end of some curling ribbon to form a stopper, we also used some child friendly plastic needles for the first time and these were a real hit.

It took awhile for Miss M to master pushing the needle through the patty pans, but  once she got the hang of it I couldn't stop her. This is great for building fine motor and hand eye coordination. 


Once our ribbon was full I tied it off around another piece of pasta to form another stopper.

Master E's finished masterpiece. 

Miss M's glorious creation.

Simple crafting at it's best. What simple crafts do you like to do? We would love to hear your ideas!

Sunday, 9 December 2012

Jingle Bells ~ Christmas Threading Fun

The Toddler Timers adore threading, Christmas and anything noisy so this was a perfect craft and so very simple.


We started with Christmas coloured pipecleaners, beads with large holes and some jingly bells.


We threaded lots of little beads.
Added some jingly bells.

Wound the pipecleaners back around itself to make a circle and to stop the beads and bells falling off.

And jingled the day away!

Some of our completed Jingly Bell Bracelets.

Wednesday, 19 September 2012

Fine Motor Fun with Sculpture Making

Master E and I had some time to ourselves whilst Miss M had a long nap the other day. We decided to do some crafting (nothing new for us!) and this is what we came up with.
Threading to make sculptures.

I set Master E up with a container of items to thread with, this included straws (cut into short lengths), coloured pasta (left over from necklace making), packing peanuts and some small beads.
I pushed some pipecleaners into a piece of packaging foam (I'm not really sure what it is called, was left over from buying some kinds of electrical product) and we were ready to get started.

Ready to get started.
Master E had never seen or touched packing peanuts before and was intrigued. He found it a bit tricky to thread them as they didn't have an existing  hole and was keen for me to help.

After a while he soon got the hang of it and realised that if he pushed too hard it would break which he found to be frustrating.

The beads were very popular and forced him to use his pincer grip.


Lots of beads!


I love the concentrating tongue!

My cheeky boy enjoying crafting with Mummy!

Once a pipecleaner was filled we bent it around and pushed it back into the foam to stop the pieces from falling off.


There was a bit of sorting and organising going on too!

A very proud Master E with his finished Sculpture.


The Sculpture now takes pride of place on Master E's book shelf. He was very excited by this activity and couldn't wait to show Mister Toddler Time when he got home!
We had lots of fun creating the Sculptures all while working on Fine Motor Skills and spending some lovely Mummy and Son time together! It was super easy and you could make one using what ever you having laying around like we did.
Hope you enjoyed!
R x

Tuesday, 28 August 2012

Fun with Threading ~ Snakes!

I am a bit of a collector and had been collecting bottle tops for ages when I came across an idea to turn them into snakes for a simple threading activity. This was really easy and great for fine motor skills.

We started with:
Bottle tops (I had made a hole with a pair of scissors)
Straws cut into approx 2cm lengths
Hat Elastic (Cut into 30cm lengths with a straw tied to one end for the snake's tongue and to stop all the hard work of threading falling off!)
Sticker Dots (to be used for eyes!)


All ready to get making.
Miss G concentrating so hard at her threading.

Master T working out what to add next!

Master E with all his pieces lined up.

Miss M keen to do it all by herself.

Love Master E's concentration here.

Miss G almost done.

Miss A, very busy at work.

One of the finished snakes. I love the randomness to the order. A bit of a pattern then whatever goes.

This activity was a winner. The 3 year olds were totally engrossed and had a great time creating there snakes. Such a simple activity but a great one to continue developing fine motor skills and hand eye coordination.

Wednesday, 23 May 2012

Coloured Pasta and Pipecleaner Necklaces

Yesterday Master E and I dyed some pasta. Today we were lucky enough to have a group of product testers and we set to making some necklaces. A great fine motor activity.


 We started with the dyed pasta and pipecleaners. The pipecleaners we had weren't long enough for necklaces so I twisted two together to make longer lengths.


The children chose their own coloured pipecleaner and started threading.

The rigatoni was a great size for little hands and the kids soon got the hang of it. 

Master T busy threading.

 Miss O happily showing off her finished necklace. To finish them off we just twisted the ends of the pipecleaners together.

 Master E very proud of his work.

 Master J sporting his handy work!

Once all the necklaces were finished Master E and Master S did some sorting and pattern making. I always love seeing what else the kids come up with other than what was intended!


So there you have it, simple and very effective pasta necklaces. One thing to note, Miss M was keen on sucking on her pasta which did cause the dye to run. This didn't matter as we dyed the pasta with food colouring and vinegar, but did leave an attractive stain around her mouth!