Wednesday, 29 August 2012

Father's Day Wall Hangings

With Father's Day only a few days away it was time to get crafting. I came across this super cute Finger Print Tree printable from Lovely Living. It was perfect for working with toddlers. We printed off numerous copies and let the kids loose with paint pads.
The paint pads were great for this activity as they are easy to get a small amount of paint on the fingertips and add them to the tree to create the leaves.
Once the children had finished adding leaves to their tree we backed them onto some coloured paper and laminated them.
We also used a hole punch to punch two holes at the top and thread through a pipecleaner to make our wall hangings.
Too Easy and Super Cute!


Miss L, enjoying dipping her fingers in the paint.


Master J, carefully deciding where each print should go.


Miss M, painting with her whole hand!

Master S, getting right into his art.

Doesn't take much for Miss L and Miss M to get into the whole hand painting.

Miss A, also having a go at the whole hand experience!
One of the finished works of art, all ready to give Daddy on Sunday.
 Happy Father's Day to all the Daddy's from Toddler Time, we hope you enjoy your special day!

Tuesday, 28 August 2012

Fun with Threading ~ Snakes!

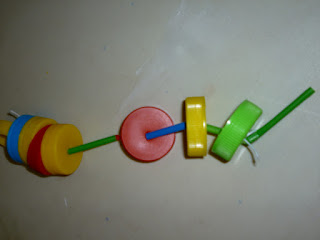
I am a bit of a collector and had been collecting bottle tops for ages when I came across an idea to turn them into snakes for a simple threading activity. This was really easy and great for fine motor skills.

We started with:
Bottle tops (I had made a hole with a pair of scissors)
Straws cut into approx 2cm lengths
Hat Elastic (Cut into 30cm lengths with a straw tied to one end for the snake's tongue and to stop all the hard work of threading falling off!)
Sticker Dots (to be used for eyes!)


All ready to get making.
Miss G concentrating so hard at her threading.

Master T working out what to add next!

Master E with all his pieces lined up.

Miss M keen to do it all by herself.

Love Master E's concentration here.

Miss G almost done.

Miss A, very busy at work.

One of the finished snakes. I love the randomness to the order. A bit of a pattern then whatever goes.

This activity was a winner. The 3 year olds were totally engrossed and had a great time creating there snakes. Such a simple activity but a great one to continue developing fine motor skills and hand eye coordination.

Sunday, 26 August 2012

Bath time Play


Sometimes I feel that bathtime can become a bit mundane, playing with the same toys, reading the same books, the usual screaming over getting hair washed. So every now and then I decide to try and spice it up a bit. Here are a few things we like to do to make bathtime more exciting!


Add Glowsticks to the bath and have a bath in the dark!

Paint! My kids love using shaving cream to paint the entire bath, and the wonderful thing is that it just washes away!
Change the colour of the water. I cheat a little bit here, I buy special bath colour tablets from the supermarket.  The kids love these and are always so excited by coloured water!

More coloured water, this time with watering cans!

Wednesday, 8 August 2012

Bugs, Bugs, Bugs!

I would love to claim credit for this craft as it is fabulous, unfortunately I cannot. We picked up this great little idea from Playgroup.

To make these cute little bugs you will need a few bits and pieces and depending on the age of the children, adult help will be required.

What you need:
Strawberry Punnets (or something similar)
Felt
Googley Eyes
Pipecleaners (we had two different sorts, one for legs and one for inners!)
Stickers for decorating
Hole Punch
Sticky Tape
Double Sided Tape (or Glue Gun)

There was a little bit of preparation needed for this activity.
The felt needed to be precut and stuck onto the lids of the punnets (we were working with 3 year olds, older children could do this themselves!) and the eyes were also already added. (I secured these with hot glue, you could use double sided tape).
An additional hole was also punched into the top of the strawberry punnet to allow for extra legs as they already had four holes in the lid.


All ready for the kids to get started. 

One of the punnets with its felt and eyes already attached. The holes to thread the pipecleaner legs through are on the lid next to the felt. 

We started by threading three pipecleaners through the holes in the top of the punnet and securing in place with a piece of sticky tape. Some of the children could do this by themselves and others needed some assistance. Was great for hand eye coordination and fine motor skills.

We then wound pipecleaners around our fingers, enough to fill the punnet and create inner of our bugs. 
Snap the lid closed, secure with tape and decorate!
We used sticker dots to decorate our bugs. Master E concentrating very hard!

Miss A busy decorating her bug.

Master T very proud of his finished Bug!

Miss A hard at work.

Miss O working hard!

Love the concentration on Miss L's face as she decorates her bug.
These bugs were a huge hit and I will be thinking carefully how to modify this idea and make some other creatures. We have an abundance of strawberry punnets in our house with Miss M being a strawberry addict!
Enjoy x

Monday, 6 August 2012

Box City

I have been collecting boxes to make a Box City for ages and with some very ordinary weather on the weekend I finally got around to getting it done! I had come across a great Blog post from My Small Potatoes where they had built a city using boxes.

I started by wrapping all the boxes in brown paper as a blank canvas for little imaginations. I also added a little  paper to the boxes before wrapping to give them some extra weight as suggested by My Small Potatoes.

Here are the boxes all ready and waiting for some little builders to arrive.
Master E was very excited to find some new blocks. He created these towers. I was surprised that he turned the boxes side on. Little minds work in interesting ways!


Miss M and Master E building a "HUGE" tower.

We decided that the boxes need some 'Pimping Up' to make them look like a real city and since we are so keen to paste at the moment I cut up lots of arches and squares to add windows and doors.


Once we had added the windows and doors I added a black outline so they stood out a bit more. I love the way the kids added many, many windows and doors. I think they look very 'Alice in Wonderland'.


The beginnings of a city.

Lots of interesting windows and doors, I wonder who lives here.

Music on, fairy dresses on, time for some serious building.

Build it up, build it up, build it higher, build it right up into the sky!

Master E, having a ball building his city.

One of Master E's marvellous creations!
We have had so much fun building using our new city blocks, they have provoked lots of discussion and for my husbands benefit, I was keeping those boxes for something important!