Wednesday, 8 August 2012

Bugs, Bugs, Bugs!

I would love to claim credit for this craft as it is fabulous, unfortunately I cannot. We picked up this great little idea from Playgroup.

To make these cute little bugs you will need a few bits and pieces and depending on the age of the children, adult help will be required.

What you need:
Strawberry Punnets (or something similar)
Felt
Googley Eyes
Pipecleaners (we had two different sorts, one for legs and one for inners!)
Stickers for decorating
Hole Punch
Sticky Tape
Double Sided Tape (or Glue Gun)

There was a little bit of preparation needed for this activity.
The felt needed to be precut and stuck onto the lids of the punnets (we were working with 3 year olds, older children could do this themselves!) and the eyes were also already added. (I secured these with hot glue, you could use double sided tape).
An additional hole was also punched into the top of the strawberry punnet to allow for extra legs as they already had four holes in the lid.


All ready for the kids to get started. 

One of the punnets with its felt and eyes already attached. The holes to thread the pipecleaner legs through are on the lid next to the felt. 

We started by threading three pipecleaners through the holes in the top of the punnet and securing in place with a piece of sticky tape. Some of the children could do this by themselves and others needed some assistance. Was great for hand eye coordination and fine motor skills.

We then wound pipecleaners around our fingers, enough to fill the punnet and create inner of our bugs. 
Snap the lid closed, secure with tape and decorate!
We used sticker dots to decorate our bugs. Master E concentrating very hard!

Miss A busy decorating her bug.

Master T very proud of his finished Bug!

Miss A hard at work.

Miss O working hard!

Love the concentration on Miss L's face as she decorates her bug.
These bugs were a huge hit and I will be thinking carefully how to modify this idea and make some other creatures. We have an abundance of strawberry punnets in our house with Miss M being a strawberry addict!
Enjoy x

Monday, 6 August 2012

Box City

I have been collecting boxes to make a Box City for ages and with some very ordinary weather on the weekend I finally got around to getting it done! I had come across a great Blog post from My Small Potatoes where they had built a city using boxes.

I started by wrapping all the boxes in brown paper as a blank canvas for little imaginations. I also added a little  paper to the boxes before wrapping to give them some extra weight as suggested by My Small Potatoes.

Here are the boxes all ready and waiting for some little builders to arrive.
Master E was very excited to find some new blocks. He created these towers. I was surprised that he turned the boxes side on. Little minds work in interesting ways!


Miss M and Master E building a "HUGE" tower.

We decided that the boxes need some 'Pimping Up' to make them look like a real city and since we are so keen to paste at the moment I cut up lots of arches and squares to add windows and doors.


Once we had added the windows and doors I added a black outline so they stood out a bit more. I love the way the kids added many, many windows and doors. I think they look very 'Alice in Wonderland'.


The beginnings of a city.

Lots of interesting windows and doors, I wonder who lives here.

Music on, fairy dresses on, time for some serious building.

Build it up, build it up, build it higher, build it right up into the sky!

Master E, having a ball building his city.

One of Master E's marvellous creations!
We have had so much fun building using our new city blocks, they have provoked lots of discussion and for my husbands benefit, I was keeping those boxes for something important!

Tuesday, 31 July 2012

Make your own Textured Rubbing Plates

Every time I am in an Arts and Crafts store I look at the textured rubbing plates. Master E and Miss M love using them when they go to Playgroup but the ones at the stores are expensive. Awhile ago I came across a post to make your own. (I can't find the link). It was very simple and quick to complete.

I started with some thick cardboard and cut them into large squares (I always have things like this stashed away, a nappy box would work perfectly), my trusty gluegun and some extra glue sticks.

Once the glue was quite hot I got to making patterns, these aren't fabulous but for the purpose it doesn't matter. I found it hard to control the amount of glue coming out and sometimes needed to retrace my lines.


Here are the finished plates, spots, swirls, lines, big and small zig zags and diamonds.


Here is a quick sneak peek of the pattern made from one of the zig zag plates. Not bad for my first attempt!

They are now ready and waiting for Master E and Miss M to get up and have a go. That will be the real test. If they go well I might have a go at making some letter and picture plates.
Enjoy! 

Sunday, 29 July 2012

Small World Play ~ Construction Zone

Master E is right into Imaginative Play at the moment and is often roll playing. With a love of all things construction and vehicle related I set up this small world play for him and of course Miss M!

We started with a large low sided tray which I filled with our Rainbow rice (this has been the basis of many play sessions, usually cooking!) Here is the link on how to make the Rainbow Rice. I then added a few construction vehicles a digger, some dump trucks and trailers.

There was a lot of filling and emptying going on.

We filled up all the trailers and drove them around the construction sight.

Master E found it hard to scoop the rice up with the digger and enjoyed the sensory experience of using his hands.

Once Miss M decided to join in we found that we were short of vehicles so we added in some workers. Who apparently needed a rest! Miss M then decided we needed to have planes and helicopters too!

Miss M busy filling up a trailer.

The digger was busy "Digging a BIG hole!" There has been a lot of construction work near our house along the railway lately, so we have had lots of opportunities to watch what the construction vehicles are doing which made for some great role play and conversation.
Like with our other Small World Play there was a lot of play generated from this activity more than half an hour (a long time for my almost 3 year old and almost 2 year old). 

We did plan this one well and placed a plastic mat underneath the tub for an easy clean up of any spills.  This was very popular and as will all our rice activities the rice was packed away to be used again soon!

Tuesday, 24 July 2012

Cherry Blossom Printing using Softdrink Bottles

Today I had the pleasure of sharing the afternoon with some lovely young men, while their Mummy went off to have a much deserved massage. Her birthday is just a few days away so we decided we should make her some lovely art for the walls. I had seen this amazing Cherry Blossom Art from Alphmom and decided to make our own variation suitable for 2 to 4 year olds.


We started with empty 600ml soft drink bottles, some paint and cheap flat canvases.

The boys proceded to dip the bottles into the paint and print the bottom of the bottles onto their canvases. Making lovely flower/blossom shapes.


Master T who is 4 was great at creating the prints. Here he is inspecting his work.

Print, print, printing!

The 600ml bottles were a great size for the boys, they found them easy to hold and press down.
Master W busy printing his masterpiece. 


Close up of some of the art.


The finished works of art! And a fairly clean table!!!


I was so impressed with how easy this was and how amazing the finished pieces look. I think they look especially good as they are on canvas. (These were only cheap canvases $4 for a 2 pack). The boys felt super special knowing that they were creating real art and that it was for a purpose as a gift for their Super Mum Mrs S.
The only think to note is that they do take quite awhile to dry as the paint goes on rather thick. So allow for plenty of drying time.

Happy Creating!

Colour Sorting using Car Pictures

Master E is car mad and loves pasting so we decided to combine the two and do pasting with car pictures and threw in some colour sorting just for fun.
We started with six different coloured pieces of paper, a glue stick and a pile of car pictures I had cut out of magazines (got to love the op shop!)

Ready to get started.


Getting the hang of matching the colour of the cars to the colour of the paper. 


Being very industrious!

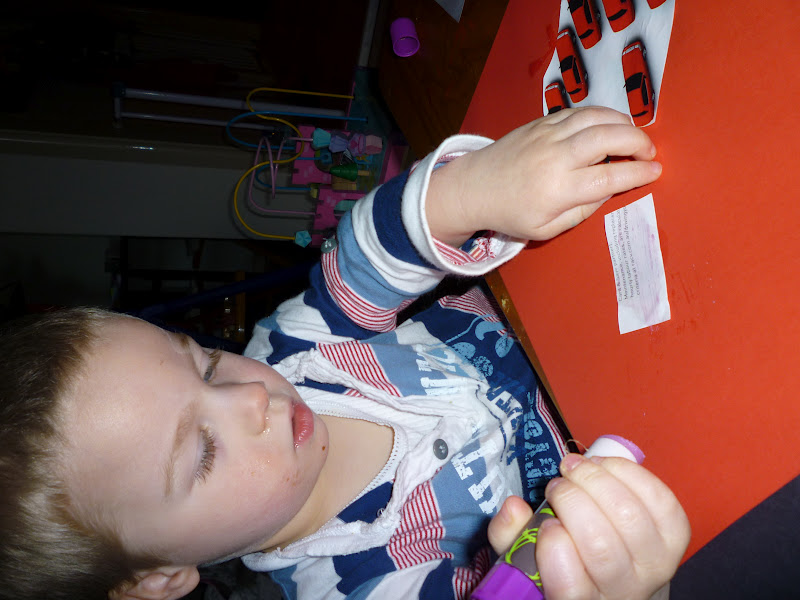
The finished pages, since we didn't come across any green cars in our pile we made the pages into a book with a green cover. Master E has been very keen to read his car book regularly!

Master E and I had a great time working on the car sorting together. He got the hang of matching the colours very quickly and needed less of my help than I thought.
We will be trying this one again soon, however with motor bikes next time!

Thursday, 19 July 2012

Cotton Bud Painting

I had been meaning to try cotton bud painting for awhile. Master E is very keen on paint and this was a great way to minimise the mess while still giving him the paint experience.

I put a small amount of paint into an egg carton and added cotton buds.


Miss M was keen to get stated. The cotton buds were great as they absorbed the paint, so there were no drips or spills.


The paint went on nice and thin and made for quick drying.

Master E was painting a "Rainbow".

Some of Miss M's lovely line work.

Miss M practising her pincer grip with the cotton buds.

Master E decided some colour mixing was essential and ended up with a lovely teal, a mucky green and some grey!


We loved this way of painting and will be doing it again soon. Was fairly mess free and helped to develop fine motor skills. Another great thing was that there was no need to wash up paint. I just threw away the cotton buds and egg cartons, WIN!!

Hope you enjoy it too!